Divi Plugin Highlight: Divi Team Members

Divi’s Person module is a great way to showcase your staff. It includes a location for their name, position, social media links, description, and an image. It’s a simple module with all of the person’s information stored within the module itself. What if you wanted to add categories and select which team members to display based on those categories? What if you wanted to change the design for every team member at once? What about layout options or a filter?

A third-party plugin for Divi called Divi Team Members does exactly that. It adds 6 modules to the Divi Builder with multiple layout options and styling features and an area to create your team members. You can place as many modules as you want and select which categories each module will display.

Let’s take a look at Divi Team Members and see what it can do. Images from these examples came from Elegant Themes layouts. I’m using a combination of squared and circled images.

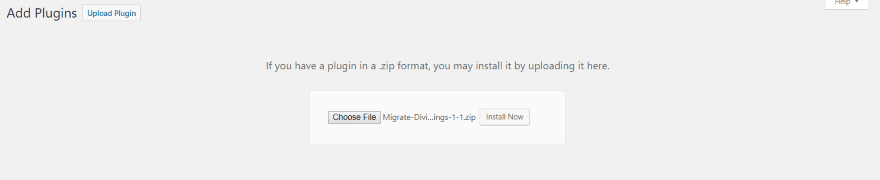
Installing and Activating Divi Team Members

Once you upload and activate the Divi Team Members plugin you’ll need to activate the license. In the dashboard, go to Settings > Divi Team Members, and enter your API key and email.

Divi Team Members Menu

A new menu is added to the dashboard called Team Members. Within this menu you’ll find the list of team members, area to create a new team member, department categories, and settings.

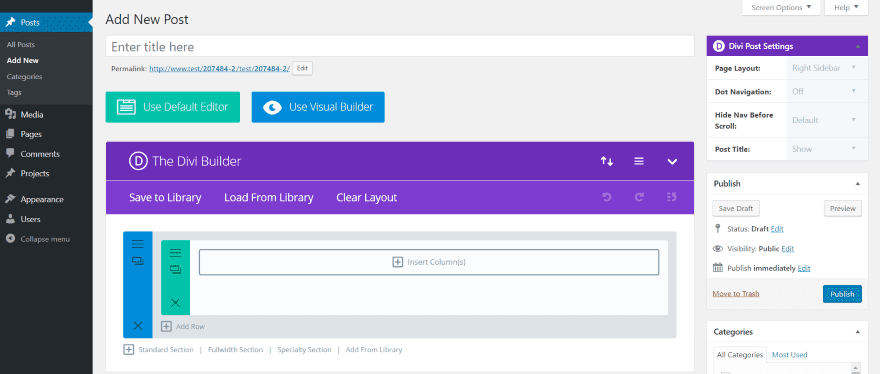
Adding a Team Member

Create Team Member includes a TinyMCE editor, department categories, team member image, and team member information. Here you can add content and create categories just like with a WordPress post. Create the team member and hit Publish.

Team Members lists each of the team members that you’ve created. You can search, perform bulk actions, and view by category.

Department Categories works the same as normal WordPress Categories. Add the name, slug, parent, description, etc.

General Settings allow you to set the display length for the content, choose the archive page, set the archive page layout (grid or list), choose the number of members per page, show the filter, pagination, and detail link.

Divi Team Members Modules

The Divi Team Members plugin adds 6 new modules to the Divi Builder:

  • Team Members
  • Team Members Grid
  • Team Members Horizontal View
  • Team Members List
  • Team Members Slider
  • Team Members Table

Most of the modules includes the same or similar options, but display differently. The Team Members and Team Members Grid modules have 52 layout options. Other features include a category filter, categories, ordering, link type (includes custom options), color options, display the social link, etc. The Team Members List module includes 4 layout options. The filter button has 20 different styles built in.

The Design tab includes the team name text, designation name text, description name text, border, box shadow, and animation. Some of the modules include customizations for telephone text and website text. They have basic customizations for the fonts.

The Advanced tab includes custom CSS fields so you can style many of the elements individually.

With 52 layout styles and 20 button styles, it clearly has enough design options to create practically any type of style you could want. Each of the elements are customizable. You can adjust the background colors, overlay colors, text, icons, and filter buttons.

Divi Team Members Examples

Here’s the Team Members module using the default settings. It actually displays all of my team members, but only three on a single line. The team members are shown as individual cards. It zooms the image and shows the social links on hover. In this example I’m hovering over the middle card. This is the Style1 layout. Even the default settings has an elegant enough design to use as it is.

Here’s the Style2 layout. It adds an overlay with social links on hover.

Style3 adds a READ MORE link on hover.

Style4 adds an overlay with gradient and social icons on hover.

Style6 adds a circular overlay with all of the text animated.

Style7 brings in the social icons and adds a styled tab to the bottom.

Style8 brings in the social buttons to the right on hover.

Style10 shows the text in an overlay on hover and adds the social icons to the left.

Here’s the Style1 layout for the Team Members Grid module. It adds a filter for all of the categories. This is filter style 1.

The Team Members Horizontal View module shows all of the information within a card. This is layout Style1. It’s also filterable. This one uses Style2 for the filter button.

The Team Members List module moves the image outside of the card, and adds an excerpt from the content and a button to view more. It also includes the filter. This is layout Style1 with Syle3 for the filter button. This was a square image that the module is showing as an oval.

The Team Members Slider module includes navigation. It doesn’t include layout styles and isn’t filterable, but all of the elements are customizable.

The Team Members Table module displays a table with all of the information on a line. Every other line is a different color. You can style odd and even lines individually. I’m hovering over the bottom team member, which changes color and increases the size of the image on hover.

Here’s the Team Member’s module using Style13 within the About page of the Elegant Themes Digital Payments layout. This is the default settings.

I’ve made a few modifications including colors for the background, icons, border, overlay, and name text. I’ve set it to show 2 team members. The cards remain the same size as if it were showing 3. The size will change though if I place it within a smaller column. If I change styles, the colors stay with that style- so I can set different colors for each style. The social icons remain the same throughout the styles.

This is Style15. It keeps the colors for the social icons, but my custom colors for the overlays are default, allowing me to use a different color for each style.

This is the Team Members Grid module displaying 3 team members using Style16. I’ve placed it within a smaller column within the section.

Here’s the same module using Style17 and Random for the team member selection. I’m hovering over the middle team member, which displays the social icons in an overlay. The colors are default.

Here’s Team Members Grid with layout Style19 and filter button style 5. I’ve changed the button colors and added a background shadow to the cards to match. In this example I’m hovering over Visual Media in the filter to show the button animation.

This one uses the Design Agency layout with Team Members List module using the Style4 layout.

This Team Members List module uses Style3. I’ve customized the background color to fight within the layout’s design. I’ve set it to show only one team member.

Here’s the Team Members Table module within the Our Work section of the Design Agency layout. I’ve styled the colors to blend with the site, using white for the text and yellow for all of the icons.

You can adjust font colors independently. I’ve added a few more team members, changed the colors of the fonts, increased the font size of the team member’s name and changed it to Arimo (only the name has this option, and only this module), added a background for odd and even rows, and added a border with shadow.

Using Divi Team Members with Extra

Divi Team Members works well with Extra. This is the Team Members List module using Style2.

Divi Team Members License and Documentation

There are three licenses to choose from:

  • 1 site – $35
  • 5 sites – $60
  • Unlimited sites – $80

Documentation is provided as a download file at the developer’s website. It’s a 15-page document with detailed information about each module.

You can see more information and purchase the Divi Team Members plugin at the developer’s website.

Ending Thoughts

Divi Team Members is easy to use and looks great within Divi layouts. There are so many layout styles built in that I didn’t feel the need for much customizing. With 52 layout styles and 20 button styles in several modules, I had no issues finding something that worked within my layouts. Most of the time I just needed to style the colors to match my layout.

There were a few times I wanted to make a font bold or make some other adjustment but didn’t have a styling option for it. Styling features are still being added, so I’m sure this will be taken care of. I’m hoping to see some styling options for images such as sizes and shapes, and more font styling options. It would be nice to have a universal style that I could select rather than having to create the same overlay color when I changed layout styles.

If you’re interested in a module that’s simple and provides lots of layout options to display your team members, Divi Team Members might be the plugin you need.

We want to hear from you. Have you tried Divi Team Members? Let us know about your experience in the comments.

Featured Image via Sentavio / shutterstock.com

Divi Plugin Highlight: Divi Client Safe

We’ve all hear horror stories, and many of us have experienced them ourselves, where a client (or friend, user, etc.) decided to perform an update or tinker with something in WordPress which resulted in a WordPress catastrophe. At best it just looks different. At worst, you have to spend countless hours trying to fix it. It often results in restoring a backup, which takes time you don’t really have, or it can sometimes take days to figure out what they did.

Most of the time we end up giving our clients specific instructions (and many even include it within contracts) of what they can touch and what they can’t. This makes me think of baby Groot. “Don’t touch that button!” We can tell them not to touch it, and maybe even try to put some tape on the button, but if the button is visible there’s always someone that will push it.

One easy solution is the hide the features you don’t want them touching.

Divi Client Safe is a third-party plugin for Divi that lets you hide several items from the WordPress dashboard menu so clients won’t have access to them. It also hides the update notifications for plugins, themes, and the WordPress core to keep clients from running updates out of curiosity. This means you alone will be in charge of site edits and updates.

Install and Activate Divi Client Safe

Upload and activate the plugin as normal. There is no setup required.

Once the plugin is activated you’ll see a much simpler and cleaner dashboard menu. This is the menu that you and your clients will see. You’ll still have access to the regular menu by using a special URL.

Clients have access to posts, media, pages, comments, projects, appearance (which only includes menus and background), and users. All of the themes, plugins, widgets, and Divi menus are hidden. Clients will not see update notifications for them or the WordPress core.

This keeps users from installing themes, plugins, moving widgets, editing files, importing or exporting, etc. Without the Divi menu they don’t have access to theme options, theme and module customizer, role editor, or the Divi library.

This also creates a clutter-free WordPress dashboard, giving users a clean no-nonsense web-publishing experience. I like this for my own use. I know my dashboard could stand to be simpler.

Since they’re not part of WordPress or Divi, it doesn’t hide menus for plugins such as WooCommerce, Bloom, cache, Yoast, etc. So you won’t have to access them by special URL’s.

Accessing Hidden Menu Items

Every hidden item is still available to you. You can access each item through the use of a special URL within the documentation at the developer’s website. The image above is just a small example of the URL’s that you can use. There are 20 URL’s that give you access to the Divi Builder, Divi theme options, WordPress settings, user’s, widgets, plugins, themes, etc. Simply copy and paste the ending of the URL into your address bar and you’re there.

Rather than copying the entire URL and replacing YOUR-DOMAIN with my actual domain, I simply copy the end portion (after wp-admin/ if I’m already in the dashboard) and paste. Another option is to paste this entire list into a file and replace YOUR-DOMAIN with yours in each URL. This way you can copy the entire URL and go straight to the feature you want without having to go to your website first.

Pasting admin.php?page=et_divi_options behind wp-admin/ takes you to the Divi theme options. Notice the menu item for the Divi theme options is still not available within the dashboard menu.

The only problem with this is the inconvenience of needing a list of URL’s. They’re no longer in your menu, so that quick click isn’t an option. An advantage though is you have a much cleaner menu, which makes finding your most-used menu items much faster.

Here’s a look at the standard WordPress settings page. It doesn’t show up in the dashboard menu, but all the tools and settings are still available.

Here there be widgets.

I especially like hiding the editor. How many times have you read something like this in a forum? –

“It’s just CSS (or PHP, JavaScript, etc.). How hard could it be? I’ll just copy this code from this website and paste it here.”

Settings can be difficult enough to deal with, but code is another level all together. If I could hide one thing from that curious guy that wants to tweak a website, it’s the code editor. As expected, the theme and plugin editors are not available in the dashboard menu, but you can get to them easily with the special URL.

Clients Can Still Access the Divi Builder

Clients still have access to the Divi Builder including the backend and frontend builder, Divi Post Settings, the ability to save to and load from the library, Divi Building Settings (including Divi Leads, custom CSS, etc.), and the ability to import or export layouts. In other words, Divi Client Safe doesn’t restrict Divi’s usability (that’s what Divi’s Role Editor is for).

Frontend Menu

On the front end they’ll have access to the dashboard, themes, widgets, menus, theme customizer, and module customizer. This will allow them to see themes, widgets, and make changes in the theme customizer, but they won’t have access to the code editors, WordPress settings, plugins, or any of the Divi theme options. I would like to see this hidden if it were possible.

License and Documentation

There are four licenses available:

  • Single Site – $7.00
  • 3 Sites – $13.00
  • Unlimited Sites – $27.00
  • Lifetime Unlimited – $62.00

It includes one year of updates.

Documentation is provided at the developer’s website.

Divi Client Safe can be purchased from the publisher’s website.

Ending Thoughts

Divi Client Safe takes care of a lot of the WordPress client and user headaches that I’ve heard from the industry. One wrong tweak or update by someone that don’t really know what they’re doing can result is loss of work or changes to the website that no longer reflect your design. Restricting access just makes sense.

One of the things I like is how it controls WordPress rather than just Divi. Divi’s user access can be controlled through the Divi Role Editor, but that only limits access to Divi elements. If you only use the Divi Role Editor, clients still have access to themes, plugins, widgets, and WordPress settings.

When you’re working on a site I recommend deactivating the plugin until you’re done for the day. If you’re just going to the themes and plugin pages, it’s actually faster to just type “plugin” or “theme” in front of .php in the address bar. For the more complicated URL’s you’ll want to keep your list open so you can access it quick.

The plugin is easy to install and use. There are no settings – no user roles to adjust, no choices to make. It removes the menu items for all users and only users with access to the URL’s can see those items. Themes, widgets, and the theme and module customizer are still available on the frontend, but they won’t have access to the editors and they won’t see if an update is available.

This is the easiest method I’ve seen to limit access. If you’re looking for an easy way to hide key menu items from your clients, Divi Client Safe might be the plugin you need.

We want to hear from you. Have you tried Divi Client Safe? Let us know about your experience in the comments.

Featured Image via VikiVector / shutterstock.com

Divi Plugin Highlight: Divi Background Plus

Divi has a lot of background features. You can add a solid color background, gradient, image, or video. The image is especially interesting because of Image Blend, where you can use the solid color or gradient as an overlay. One problem though is this doesn’t work on parallax. Another problem is video doesn’t have overlays at all.

If you wanted to add overlays and parallax you’d have to use CSS. This works, but it has to be done by hand, meaning that all of the adjustments are done within the code, which takes longer to handle. You wouldn’t want most clients making changes to your code. Fortunately, there’s an easier, and safer, way to solve this problem.

A third party plugin called Divi Background Plus adds overlays to both. With this plugin you can add an overlay to a video, and an overlay to an image in parallax. In this article, we’ll take a look at Divi Background Plus and see what it can do.

You can purchase the plugin at the developer’s website.

Installing Divi Background Plus

First, unzip the downloaded file. Inside this file is a read me file and the plugin’s zip file. The read me file provides some short instructions on installing and getting started. Upload and activate the file called divi-background-plus. There’s no other setup required.

Divi Background Plus Module

A new module is added to the Divi Builder called Background Plus.

The module includes a Content tab and an Advanced tab. The Content tab includes settings for the layout level (choose the level between section, row, or column to place the overlay) and background (with the standard color, gradient, image, and video options). The Advanced tab includes the standard custom CSS features.

Divi Background Plus is the overlay module that works with the background. In other words, your background image or video is placed within the section, row, or column, and this new module adds an overlay over it. So the background image or video is in one location and the overlay is in another. If you know how to use color and gradient overlays then you already know how to create the overlays this module will produce.

To use the Background Plus module, first decide where you want to place the image or video background. You can place it within the section, row, or column. Next, drop the Background Plus module within that section, row, or column. Within the Layout Level setting, choose where the background is that you want to target. Let’s take a look.

Divi Background Plus Image Example

Here I’ve placed the background image within a row. I’ve enabled the parallax effect and chosen CSS as the parallax method.

Here’s the image without the overlay. It’s a parallax image that works just as we’d expect.

Next, I dropped a Background Plus module within that column.

Within the Background Plus settings I chose Row for the Level and created a gradient background. I changed the Gradient Direction to 118 degrees. We could also use a solid color rather than a gradient.

We now have an overlay over a parallax background. I’ll add some text in the overlay and then we’ll see it in action.

Here are the text modules. I’ve placed them in the right column. Since the Background Plus module doesn’t display anything in its column-location it reads as though nothing is present. I added padding to the right row’s left side to push the text over from the left a little. Alternately I could have used one column rather than two.

I’ve reduced the image size to keep the file size small, but you can see here that the image remains as a parallax background behind the gradient and text overlay.

You know me and my curiosity. I had to see if two Background Plus modules could affect the same background image.

The first module uses a red gradient on the left with an opacity of 80% and a clear gradient on the right. I set the start position to 8% and the end position to 33%.

The next module uses a clear gradient on the left with a blue gradient on the right at 74% opacity. It uses a start position of 56% and an end position of 100%.

The result is a parallax background with two overlays- one on each side in different colors with no overlay in the middle. The overlays create an interesting angle.

For this one I changed the start and end position for the left gradient to 33%.

I changed the right gradient’s start and end position to 87%. I also change the gradient direction to 72 degrees. This means the red and blue will be asymmetrical (which might make my eyes twitch, but we’ll try it anyway).

The result creates a sharp line so the gradients are easier to see. This background is still in parallax. So, you can use two modules for the same background image in parallax. I saw no effect on page-speed.

Divi Background Plus Video Example

I’m adding a background video within a row with text as an overlay. Since video backgrounds don’t have a parallax option natively, we can’t create parallax video backgrounds even with Divi Background Plus. However, the ability to add an overlay to a video still gives us lots of design possibilities.

Here’s a screenshot of a background video with the text. The text is difficult to read. Normally I would add a background behind the text, but that can be difficult to get the look you want.

I’ve added an overlay over the video using a solid color. I used black with an opacity of 50%.

For this example I’ve created a gradient and changed the gradient type to radial with a center radial direction. The start position is 41% and the end position is 100%. I’ve set the first color to black with an 80% opacity. The second color is light gray with 40% opacity.

The result places a dark spot in the center so the text stands out.

Now I’m adding a red overlay. The left color uses an 80% opacity while the right color has 56%. I’ve set it back to linear for the gradient type and set the direction to 162 degrees, the start position to 42%, and the end position to 75%.

It creates a thick red with variations within the gradient.

And of course I had to try two Background Plus modules with video. This time I moved the background video to the section and targeted it with a background, and then placed another to target the row for the text module.

For the module that targets the section I placed red on the left and blue on the right, both with an opacity of 70%. The gradient direction is 162 degrees, the start position is 40%, and the end position is 60%.

For the module that targets the row I created a gradient that’s opposite the one for the section. It uses blue on the left and red on the right, both with an opacity of 70%. The gradient direction is 158 degrees, the start position in 0%, and the end position in 100% in order to create a softer blend of the colors. For the row settings I added 50 pixels of padding on all sides and added a box shadow.

The result is an overlay over an overlay with the background video showing through.

Using Divi Background Plus with Extra

All of the settings with Divi Background Plus are standard Divi Builder settings and it works well with Extra. Here’s a screenshot of the background video from the example above. All of the settings are still in place. The overlay over the overlay allows the background video peek through as expected.

Divi Background Plus License and Documentation

The plugin is $10 and you can use it on as many websites as you want. Documentation is provided as a document within the download file (although there isn’t much there really) and as a video walk-through on the publishers’ product page. I highly recommend watching the video as it demonstrates the plugin in action.

Ending Thoughts

Divi Background Plus opens up some interesting design possibilities. It’s easy to use – if you know how to use background settings for colors, gradients, images, and videos then you already have the skills to use this plugin. The only difference is this plugin creates an overlay separately from the background. If you’re interested in creating background overlays over images in parallax or over videos this plugin is worth a look.

We want to hear from you. Have you tried Divi Background Plus? Let us know what you think about it in the comments.

Featured Image via Lepusinensis / shutterstock.com

Divi Plugin Highlight: Migrate Divi Theme Settings

One of the many advantages of Divi is the ability to import and export your theme settings. This means you can build a site in one location, such as an offline server or test site, and then move those settings to another site. There are lots of ways to move your settings and some are easier than others. One of the easiest methods is to use a plugin called Migrate Divi Theme Settings.

Migrate Divi Theme Settings is a third-party plugin that lets you easily backup or migrate theme options and customizer settings, including both the Theme Customizer and the Module Customizer, with a single click. You can backup or move your data, design elements, and development work of Theme Settings and Customizer.

This is great for those who like to try out different theme settings without losing them, and for Divi child theme developers who want to give users multiple options or an easy way to upload options. You can purchase Migrate Divi Theme Settings from the developer’s website. Let’s take a look at what the plugin can do.

Installing Migrate Divi Theme Settings

Upload and activate the plugin as normal on each of the sites you plan to use your settings. No other setup is required in order to backup or migrate your theme from one WordPress installation to another. You’ll have to add a file to your child themes’ php in order to include the plugin within your child theme package. We’ll take a look at that process later.

Using Migrate Divi Theme Settings

In the dashboard, go to Divi, Migrate Settings. Here you can import or export your Divi theme settings.

There are three ways to use Migrate Divi Theme Settings:

  1. Make a backup of your own website’s settings. This is especially good if you make lots of changes to your design but want to retain a previous design just in case you want to go back to it or use it somewhere else.
  2. Move a design from one WordPress installation to another. This is good for those who create layouts on a local server or test site and then move the design to its new home when the design is complete (such as creating your new site offline or creating sites for clients).
  3. To package child themes. The child theme user would have an easy method to import the child theme files.

Anything that uses the get_theme_option() is included within the file.

For the Theme Customizer this includes settings such as colors, fonts, Theme option settings will also match except for the name of the site, tagline, homepage settings, menus, widgets, etc.

For the Theme Options this includes settings such as URL’s for the logo, favicon, social networks, ads, etc., which will have the address from the imported theme options. Features that are enabled or disabled will match. Categories and pages to exclude in the Navigation tab will match if you have the same pages and categories on both sites. The layout tab will match the theme’s meta items to display for post info. Code for ads and integration will match.

It didn’t overwrite my username and API key or import my custom CSS in the theme options. This will not include content such as pages, posts, users, media, layouts, and menus. However, if you create a child theme with this data, Migrate Divi Customizer Settings will migrate the theme options and customizer settings for the child theme.

Exporting Your Settings

To export your theme settings click the button labeled DOWNLOAD DATA in the section on the right. A filed named divi-settings-backup will automatically download to your computer. I recommend renaming this file using your favorite naming conventions.

This is a backup of your theme’s settings including the Theme Customizer, Module Customizer, and Theme Option settings. All of the theme’s data is included when you make the backup. This not only includes settings, but also includes API keys. I recommend removing all keys before making backups with this plugin.

Import Your Settings

Unless this is a new site with no design elements you want to keep, make a backup before importing files to the website. To import, first install and activate the plugin on the new site and navigate to the plugin’s menu, then click the button labeled Choose File in the section on the left. This will open a window where you’ll navigate to the file. Click on the file and select Open. Click the button labeled UPLOAD FILE.

A message will appear when the upload is complete. You’re theme settings will changed to match the imported file. It’s that simple.

Include Migrate Divi Theme Settings Within Your Child Themes

This plugin can be coded into your child themes. It comes with a file that you can copy and paste to your child themes’ php file to embed the code. Anyone installing your child theme would simply upload the themes’ settings as in shown in the example above. This feature requires the Unlimited Sites license.

Unzip the downloaded file (the plugin file). Within the zipped file is a text document called functions-php-copy-and-paste.

Copy all of the text. Open the child theme’s php file and paste the text between the opening and closing tags.

For this example I created a blank child theme using the free child theme builder tool at Divi.Space. I then unzipped the file and opened the Functions php file.

I’ve added a space to my child theme’s php file just above the last php tag. I’m pasting the code into that location.

After uploading and activating the child theme, Migrate Divi Theme Settings is now added to the Divi menu in the dashboard, only this time it isn’t a plugin that the user can uninstall. Instead, it’s part of the child theme.

The user can now upload the customizer and theme option file you’ve provided for them. This is a great way to provide multiple styles and options and let the user choose which they want to use. You could show multiple styles of the child them, each with a different name, and then name the file based on the child theme’s style. Each of the styles would be a file within the download package or they could be downloadable as separate files which you could even add to later.

License and Documentation

Documentation is provided at the developer’s website. There’s also a short READ ME file within the zipped file. Although, the information is short because there really isn’t much to cover. An example of adding the code to a child theme would be nice, but if you can make child themes you probably wouldn’t need anything more than is mentioned within the functions copy and paste file. Just be sure to read the comments within that file.

There are four different licenses:

  • Single site $7.00
  • 3 Sites $13.00
  • Unlimited Sites $27.00
  • Lifetime Unlimited $62

It includes 1 year of support and automatic updates.

Final Thoughts

Migrate Divi Theme Settings is simple to use. It doesn’t require any setup and is intuitive. I think beginners wouldn’t have any problems using this plugin. The interface for import and exporting files is labeled well and easy to understand.

There isn’t much I would change with this plugin. I’d like to see it retain the CSS in the Custom CSS field within the Divi Theme Options. I’d also like to see a version for Extra. This is one of the easiest methods I’ve seen to backup or migrate theme settings. If you’re looking for a settings migration plugin that’s easy to use, Migrate Divi Theme Settings might be the plugin you need.

We want to hear from you. Have you tried Migrate Divi Theme Settings? Let us know what you think in the comments.

Featured Image via hanss / shutterstock.com

Divi Plugin Highlight: Revealing Footer for Divi and Extra

One of the most interesting footer design elements is a revealing footer. A revealing footer is when your footer remains locked in place but isn’t seen until the web page scrolls past it to reveal the footer underneath. It’s like the footer is sitting behind a curtain. When the curtain is raised the footer is revealed. One of the easiest ways to make a revealing footer is by using a third-party plugin called Revealing Footer for Divi and Extra.

A revealing footer can be created by hand if you want to dig into CSS. CSS can be added to either the theme customizer, theme options, or a single page. You would also add the code to change the footer height. You could even add an extra touch of code for a box shadow effect to the last section so it will stand apart from the footer area. To create a revealing footer by hand see the article How to Create a Footer Reveal with Divi. If you want some inspiration for footer designs, see the article 15 Divi Websites with Excellent Footer Design.

Of course the advantage of a plugin is you don’t have to handle any code at all. This is ideal for those who don’t have the skills or don’t want to deal with code. In this article we’ll see how to create a revealing footer for both Divi and Extra using this plugin.

Installing Revealing Footer for Divi and Extra

This plugin is surprisingly simple to use. Simply upload and activate the plugin. In the dashboard go to Plugins > Add New > Upload Plugin. There is no other setup required. Once you activate the plugin is works automatically. It’s site-wide. Anything you have in your footer area is revealed on scroll. There are no modules or settings to deal with. The last section will show with a box shadow.

This plugin only works on the standard Divi footer. If you’re creating a custom footer using the blank page template this plugin won’t work on that page because it technically doesn’t have a footer.

It’s responsive and works within the three footer areas:

  • Widgets
  • Menu
  • Bottom bar

Styling Your Footer Area

Your footer area will display the bottom bar, which includes the message Designed by Elegant Themes | Powered by WordPress, and your social media icons. It will also display any widgets you’ve placed within the footer widget area and a footer menu if you’ve assigned one. All of this can be customized with the Theme Customizer. You can see the footer being revealed in the image above.

Creating an Interesting Revealing Footer

In this example I want to add images to go along with the website. They will show the various services that the website provides. I’m showing four columns with an image widget in each column. The images are set to show thumbnails and I’ve added a title to each one. The images are starting to show in the image above.

Here’s the footer area after scrolling. The images show the services and clicking on them takes the visitor to that page.

This one uses a footer menu.

Here the footer after the scroll is complete. Next I’ll combine the elements and give them some styling.

I decided to play around with the colors and text. I’ve increased the size and changed the colors of the text, links, footer text, and social icons. I’ve also adjusted the background colors. For the footer menu I added space between the letters. I’ve added my own text at the bottom. The section above the footer creates a nice shadow.

Here the footer is becoming visible as I scroll to the bottom of the page.

And here’s the footer completely revealed as I reached to bottom of the page.

It even adapts to the height of the footer. This is great for large footers or footers that have dynamic content. In this example, which uses random text just to take up space, the previous section has moved completely off the screen. On zoom the section is visible above the footer.

On mobile the section scrolls to reveal the footer as normal.

After the last section has finished scrolling the footer itself will scroll until you reach the bottom of the site.

Here’s a look at the revealing footer in motion.

Using the Revealing Footer with Extra

As promised Revealing Footer for Divi and Extra does work with Extra. The footer elements are different from Divi to Extra but the revealing effect is exactly the same. Extra places the footer menu in the bottom right corner and uses three widgets by default. This example uses the same layout with a sidebar.

Here’s the footer fully revealed. This is the default styling.

License

There are two purchase options. Both options include lifetime support.

  • Single site – $9.99
  • Unlimited sites – $24.99

You can purchase Revealing Footer for Divi and Extra from the developer’s website.

Ending Thoughts

The revealing footer is an excellent design that makes your footers stand out. Using the Revealing Footer for Divi and Extra plugin makes them easy to create. Divi and Extra both can create nice footers which includes the widget area, footer menu, and bottom bar and they can be styled easily with the Theme Customizer.

Although you can add this feature to Divi or Extra by using CSS, this plugin does all of the work for you. Just install it and activate it. No other setup is required. I would like to see some settings for the shadow so it can be adjusted, but it does look good the way it is so most users probably wouldn’t want to adjust it anyway.

If you’re interested in creating a revealing footer for Divi or Extra without having to use code, the Revealing Footer for Divi and Extra plugin might be the solution you need.

We want to hear from you. Have you tried Revealing Footer for Divi and Extra? Let us know how you liked it in the comments.

Featured Image via Maisei Raman / shutterstock.com

Fab Geni Digital Media Solutions 2021